
Gather your crochet supplies
Start by picking up a medium-sized hook and a ball of light-colored yarn. A size H/8 (5 mm) aluminum hook is the standard starting point for most beginner patterns. It is large enough to see your stitches clearly but small enough to build good tension. Aluminum hooks slide smoothly through the yarn, letting you feel the rhythm of the craft without the friction of plastic or bamboo.
Choose a worsted weight yarn, labeled as number 4 on the ball band. This thickness is thick enough to work up quickly, giving you immediate visual feedback, yet thin enough to handle comfortably. Light colors like cream, pale gray, or soft blue are essential for beginners. Dark yarns hide your stitches, making it difficult to spot mistakes or see where to insert the hook.
You only need a few basic tools to begin. A pair of sharp scissors for cutting yarn and a blunt-tapestry needle for weaving in loose ends are sufficient. Avoid complex kits with dozens of specialized tools; they often lead to decision paralysis. Focus on these three items: hook, yarn, and scissors.
Keep this simple checklist nearby as you shop to ensure you have everything needed for your first project.
-
H/8 (5 mm) crochet hook
-
Worsted weight (size 4) light-colored yarn
-
Sharp scissors
-
Blunt-tapestry needle
Hold the hook and yarn correctly
Crocheting is a tactile craft, and your grip determines whether your stitches flow smoothly or fight against you. There is no single "correct" way to hold the hook. Most crocheters choose between the pencil grip and the knife grip, often switching between them depending on the project or their comfort level. The goal is control, not rigidity.
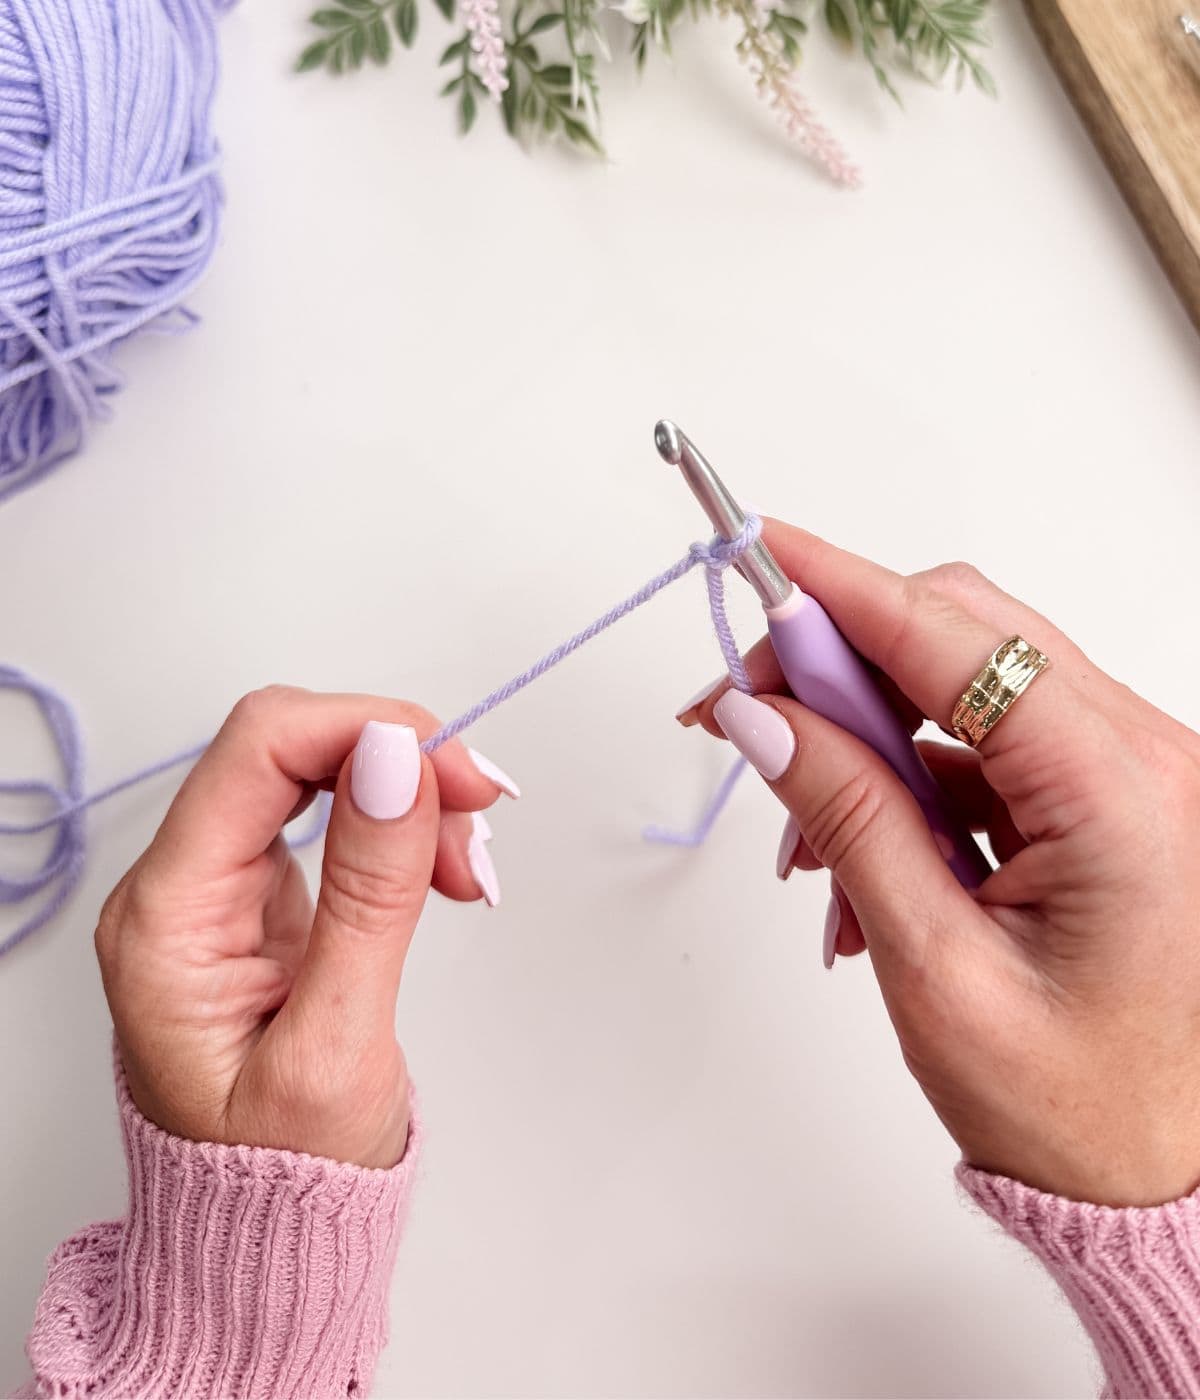
The two primary methods are the pencil grip and the knife grip. In the pencil grip, you hold the hook like a writing instrument, pinching it between your thumb and index finger while resting it against your middle finger. This offers fine motor control and is popular for detailed work. In the knife grip, you hold the hook like a dinner knife, using your thumb to push the hook forward. This leverages larger arm muscles and is often preferred for bulky yarns or tight tension.
Regardless of your grip, you need to manage the yarn tail. After making your slip knot, place the tail end of the yarn over your non-dominant hand. If you are right-handed, the yarn should come from the ball and rest across your fingers on your left hand. The tail should be secured under your pinky or between your pinky and ring finger to prevent it from unraveling while you work.
Tension is the consistent pressure you apply to the yarn as you pull it through loops. For most standard cotton or acrylic yarns (medium weight #4), your non-dominant hand should wrap the working yarn over your index finger to guide it, while your pinky holds the tail. Your thumb and index finger on your dominant hand should hold the hook firmly but not tightly. Aim for a rhythm where the yarn slides smoothly but doesn't slip out of control.
Practice this positioning for a few minutes without the hook, just wrapping the yarn around your fingers. Once you can maintain even tension without looking at your hands, you are ready to move on to your first stitches.
Make a slip knot and chain
Every crochet project begins with a slip knot and a foundation chain. Think of the chain as the backbone of your work; if it’s too tight, your stitches will fight you, and if it’s too loose, the fabric will sag. For this guide, we’ll use a size H/8 (5mm) hook and medium-weight (worsted) yarn to keep the tension manageable.
Create a loop with about 6 inches of yarn tail. Insert your hook through the loop, grab the working yarn (the end leading to the ball), and pull it through to form a second loop on the hook. Tighten it gently by pulling both the tail and the working yarn. The knot should slide smoothly on the hook but not fall off.
Hold the hook in your dominant hand like a knife or pencil. Use your non-dominant hand to hold the slip knot and guide the working yarn. Wrap the working yarn around your index finger to maintain consistent tension. This grip is crucial for keeping your chain even.
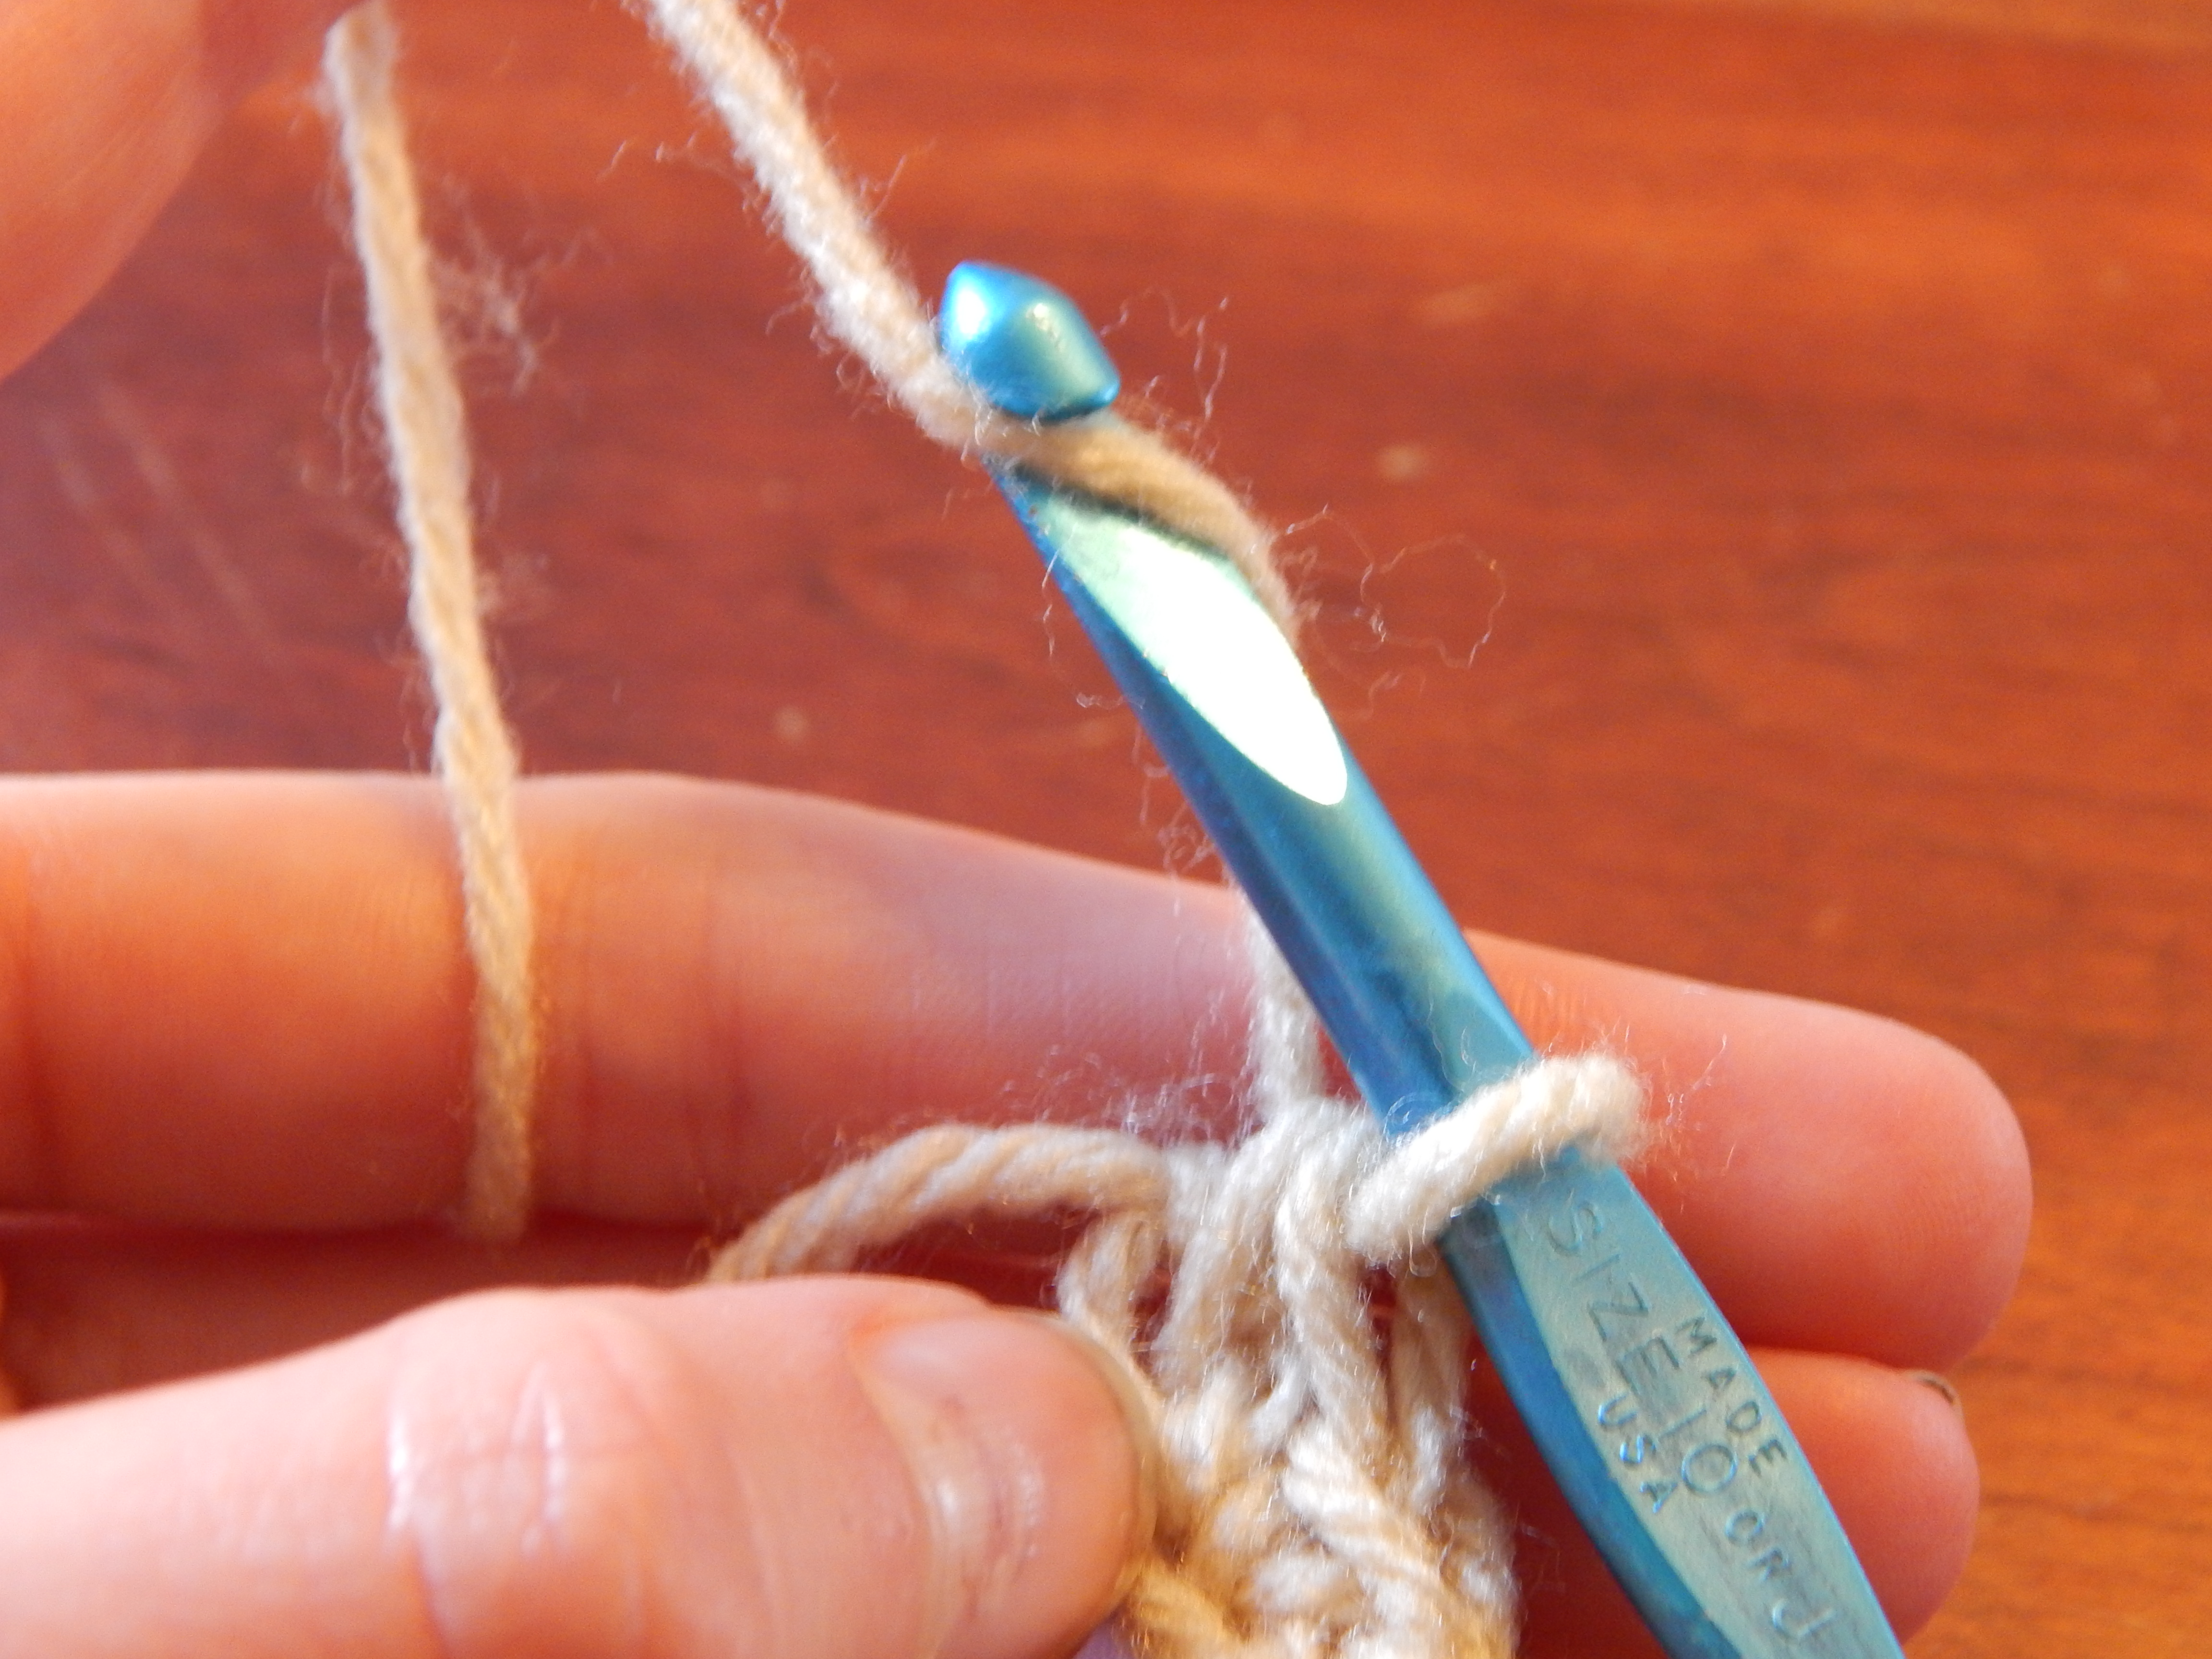
Wrap the yarn from back to front over the hook (yarn over). Insert the hook into the loop on the hook, catch the yarn, and pull it through the loop. You now have two loops on the hook. This single action—yarn over, pull through—is the repetitive motion that builds your chain.
Repeat the motion until you have the desired number of stitches. For a beginner swatch, chain 20. Count the "V" shapes on the top edge of the chain to verify your count. Ensure the chain isn’t twisted before you begin your next row.
A loose, even chain makes the rest of the project easier. If your stitches feel cramped, try using a hook one size larger just for the foundation chain, then switch back to your standard hook for the first row.
Learn single and double crochet
These two stitches form the foundation of most beginner projects. The single crochet creates a dense, sturdy fabric, while the double crochet builds height and drape. Mastering these motions allows you to create everything from tight coasters to lightweight scarves.
Single crochet
The single crochet (sc) is the tightest standard stitch. It creates a fabric that holds its shape well, making it ideal for items like amigurumi or warm blankets. Use a hook size recommended for your yarn weight, typically between 3.5mm and 5.5mm for worsted weight yarn.
- Yarn over and insert the hook into the next stitch.
- Yarn over and pull up a loop. You now have two loops on the hook.
- Yarn over and pull through both loops on the hook.
Double crochet
The double crochet (dc) is taller and faster to work than single crochet. It creates a more open, flexible fabric, perfect for shawls or summer tops. This stitch requires an initial yarn over to build height before entering the stitch.
- Yarn over, then insert the hook into the next stitch.
- Yarn over and pull up a loop. You now have three loops on the hook.
- Yarn over and pull through the first two loops. Two loops remain.
- Yarn over and pull through the remaining two loops.
Read basic crochet patterns
Patterns are the blueprint for your work. Once you understand the shorthand, a complex blanket becomes a series of simple, repeatable actions. Abbreviations save space; without them, a scarf pattern would fill an entire book.
Start with the gauge. This is the number of stitches and rows per inch. If your gauge doesn't match the pattern, your finished piece will be the wrong size. Use a ruler to count your stitches in a 4-inch square. If you have too many stitches, move up a hook size; if you have too few, move down.
Next, learn the standard abbreviations. Most patterns use US terms, but some use UK terms. Always check the key at the start of the pattern. Here are the five most common ones you will encounter:
Pay attention to the stitch count at the end of each row. This number should remain consistent unless you are intentionally increasing or decreasing. If your count is off, you likely missed a stitch or added an extra one. Count your stitches after every row to catch errors early, before they compound into a distorted fabric.
Fix common beginner mistakes
Crochet feels like a language; at first, you’re stumbling over the grammar. The most common errors—twisted chains and uneven tension—aren’t failures. They are feedback. Catching them early keeps your work from becoming a tangled mess that’s impossible to undo.
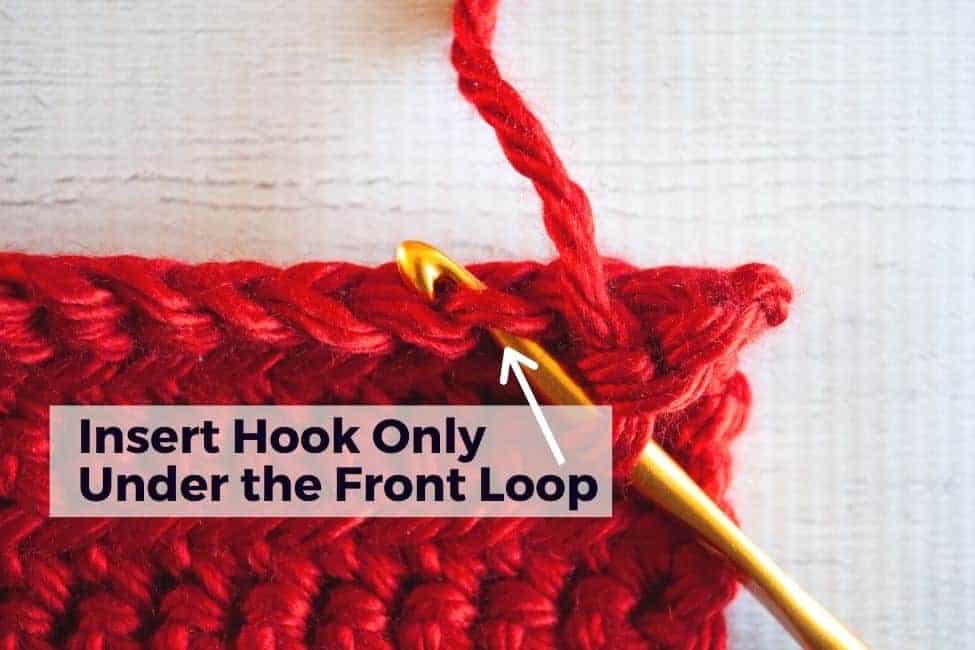
Twisted chains happen when the hook catches the back loop instead of the top two loops. This creates a tight, spiral tube that won’t lay flat. To fix it, stop pulling yarn. Use a crochet hook or your fingers to gently open the twisted loop. If the twist is tight, insert your hook into the correct loop and pull the yarn through to release the tension. Always check that each chain lies flat before moving to the next row.
Uneven tension makes stitches look like a bumpy road. This usually comes from gripping the yarn too tightly. Imagine holding a bird: tight enough so it doesn’t fly away, but loose enough not to hurt it. If your stitches are too tight, try a hook one size larger (e.g., from 4.0mm to 4.5mm) to loosen up. If they are too loose, consciously relax your grip. Consistency matters more than perfection in the first few rows.
Dropped stitches look like a ladder running down the side of your fabric. If you see one, stop immediately. Use your hook to catch the loose loop from the row below and pull it up through the current stitch. If the stitch is completely gone, you may need to unravel (frog) back to that point. It’s better to undo a few rows than to fix a large hole later.
Forgotten increases or decreases distort the shape of your project. If your circle is flaring out like a pancake, you’re adding too many stitches. If it’s curling into a cup, you’re not adding enough. Count your stitches at the end of every round. For flat circles, a good rule of thumb is to increase by 6 stitches per round. For straight edges, keep the stitch count constant.
Start your first simple project
A dishcloth is the ideal first project. It uses basic stitches, requires minimal yarn, and finishes quickly, giving you immediate feedback on your tension. You will practice the chain stitch, single crochet, and how to bind off cleanly.
Gather a 100% cotton yarn (worsted weight) and a 5.0 mm hook. Cotton holds its shape better than acrylic for washcloths and provides the friction needed to keep stitches distinct.

The Pattern
- Chain 20. Count carefully; this is your width.
- Row 1: In the 4th chain from the hook, work one single crochet. Continue one single crochet in each chain across. Turn.
- Rows 2–20: Chain 1, turn. Work one single crochet in each stitch across. Turn.
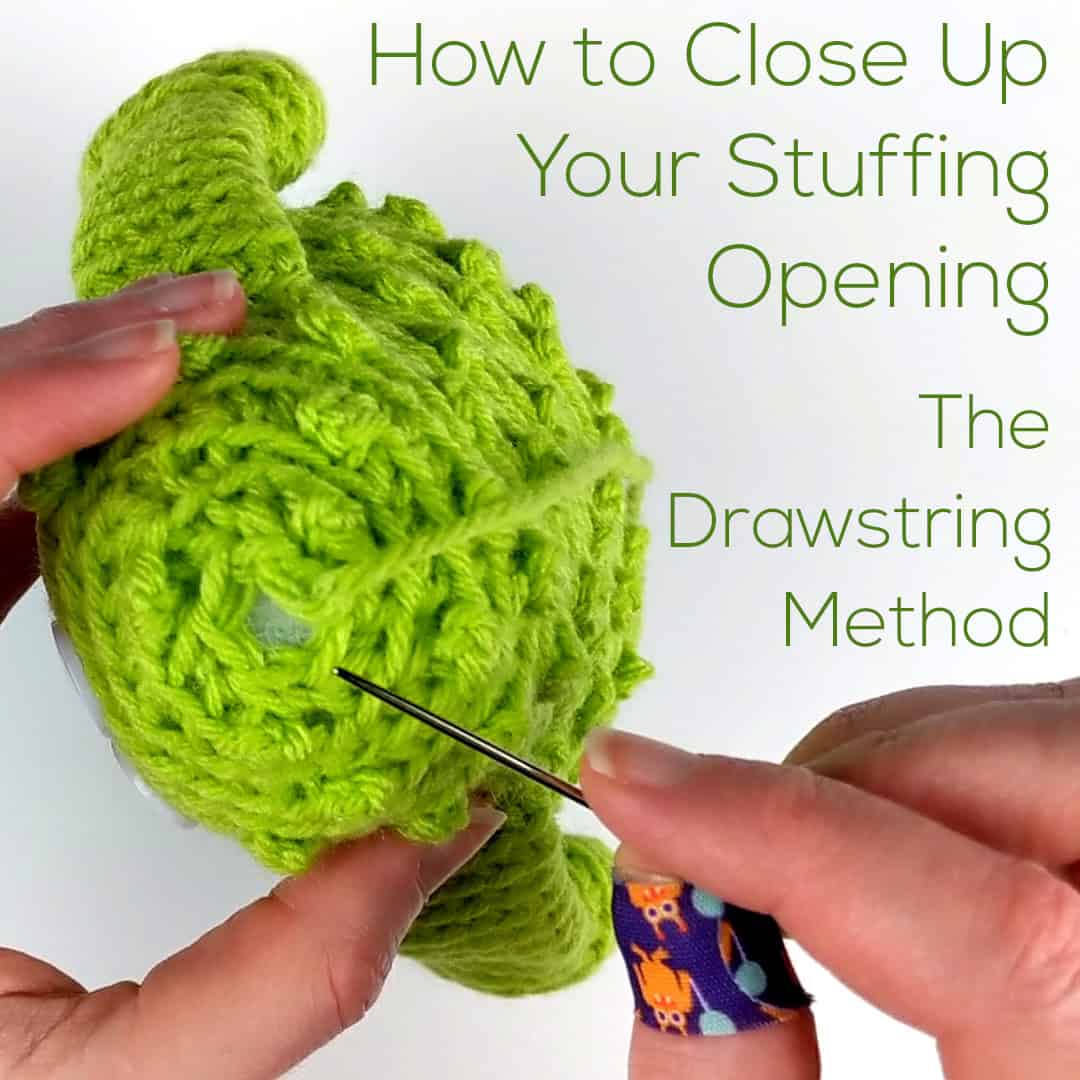
- Finish: Cut yarn, leaving a 6-inch tail. Pull through the last loop to secure. Weave in ends.
This creates a 5x20 inch rectangle. The tactile rhythm of inserting the hook, yarning over, and pulling through will become second nature as you repeat these twenty rows.
Common questions for new crocheters
Starting your first project often brings up practical hurdles. These answers address the most frequent questions about hook sizes, yarn weights, and fixing mistakes, helping you build confidence as you learn.
No comments yet. Be the first to share your thoughts!