
Pick the right yarn and hook
The cloud stitch relies on volume. To get that soft, fluffy texture, you need materials that create big, loose loops. Using the wrong yarn will result in a stiff, heavy blanket rather than a cloud-like drape.
Yarn Weight: Super Bulky (Weight 5)
Choose a super bulky weight 5 yarn. This thick yarn fills the space quickly and creates the necessary loft for the stitch pattern. Avoid worsted weight (weight 4) unless you want a denser, heavier fabric.
A light-colored yarn helps highlight the texture. The shadows and highlights in the clusters become more visible, making the "cloud" effect pop. Acrylic or wool-acrylic blends are ideal for beginners because they are soft, durable, and easy to care for.
Hook Size: Large and Comfortable
Pair your super bulky yarn with a large hook, typically 10 mm to 15 mm. The hook needs to be big enough to pull multiple loops through easily without straining your hands. A comfortable grip hook reduces fatigue during long crocheting sessions.
If the hook is too small, the fabric will be tight and stiff. If it is too large, the stitches may become too loose and lose their shape. Check your yarn label for the recommended hook size, then verify by making a small swatch. The stitches should feel loose and airy, not tight and rigid.
Master the basic cloud stitch pattern
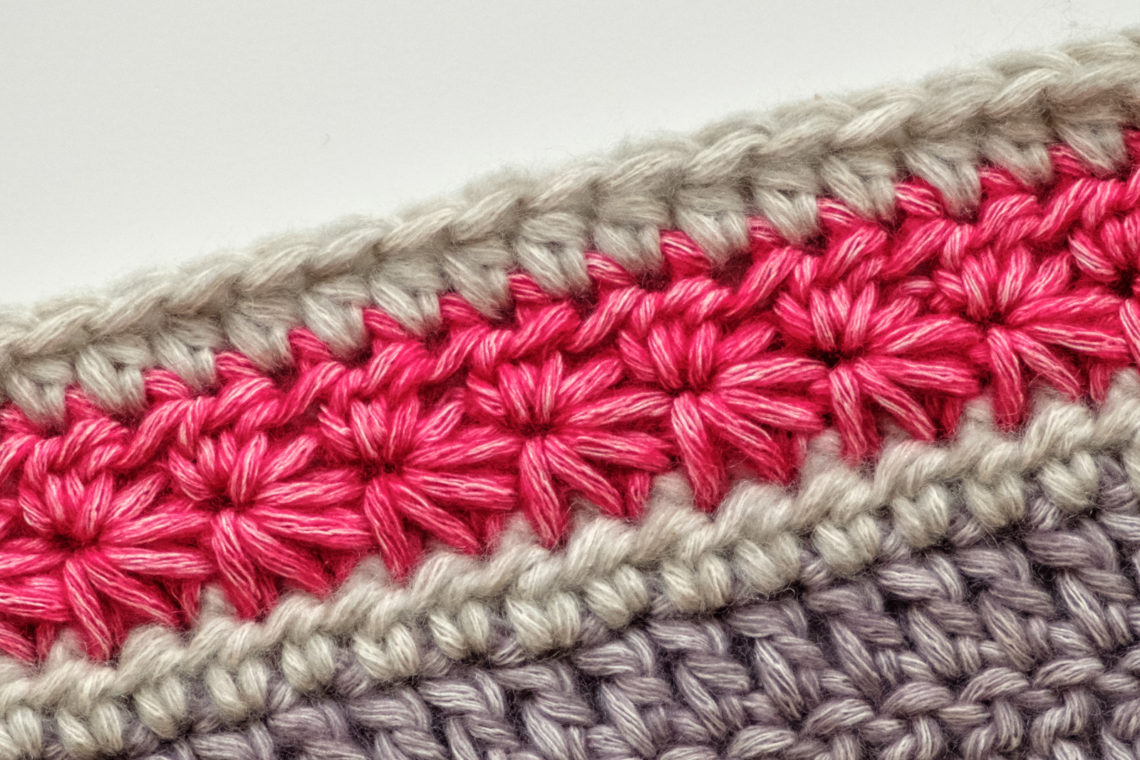
The cloud stitch is a cluster stitch variation that creates a soft, fluffy texture resembling cumulus clouds. It works by grouping multiple yarn overs into a single loop, which pulls the fabric inward for that signature bumpy, tactile look. This stitch is forgiving for beginners because it builds volume quickly, making it easy to see your progress.
To start, you will need super bulky weight 5 yarn and a large hook (size H/8 or larger). The thick yarn fills out the clusters, ensuring the blanket feels warm and substantial without requiring excessive stitching. If the yarn is too thin, the "clouds" will look flat and lose their three-dimensional charm.
Step 1: Create the foundation chain
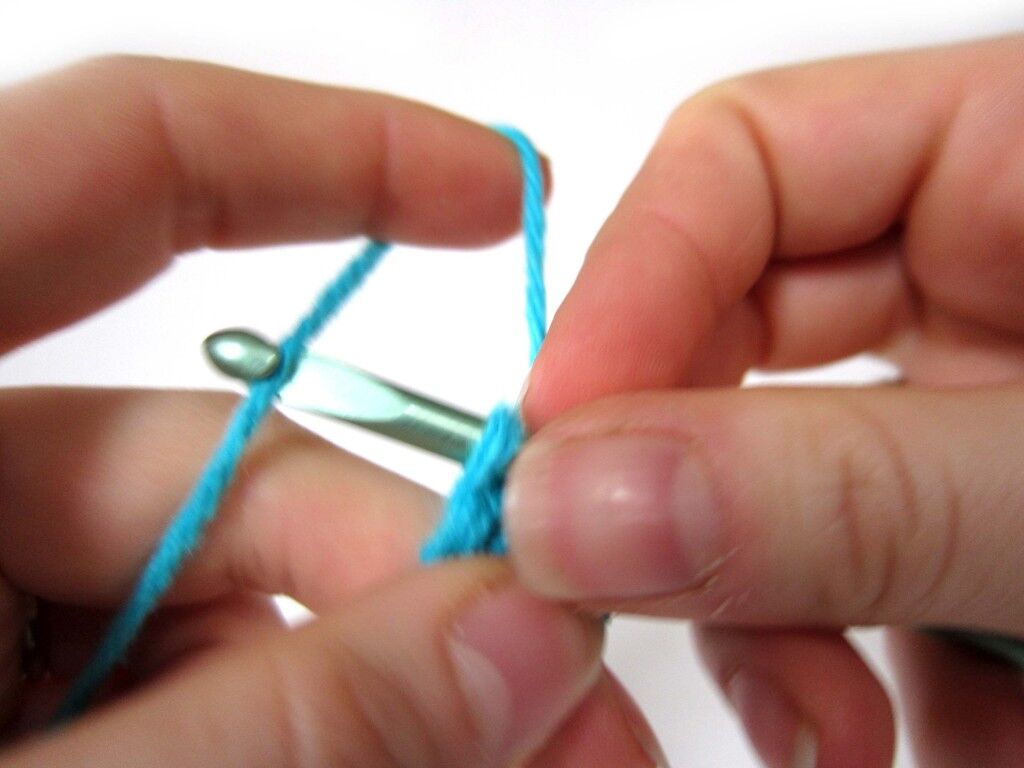
Begin by making a slip knot and chaining the desired width of your blanket. Remember that cloud stitch patterns usually require a multiple of 4 stitches plus 3 extra chains for the turning chain. Count your chains carefully; an uneven foundation will cause the rows to twist or curl at the edges.
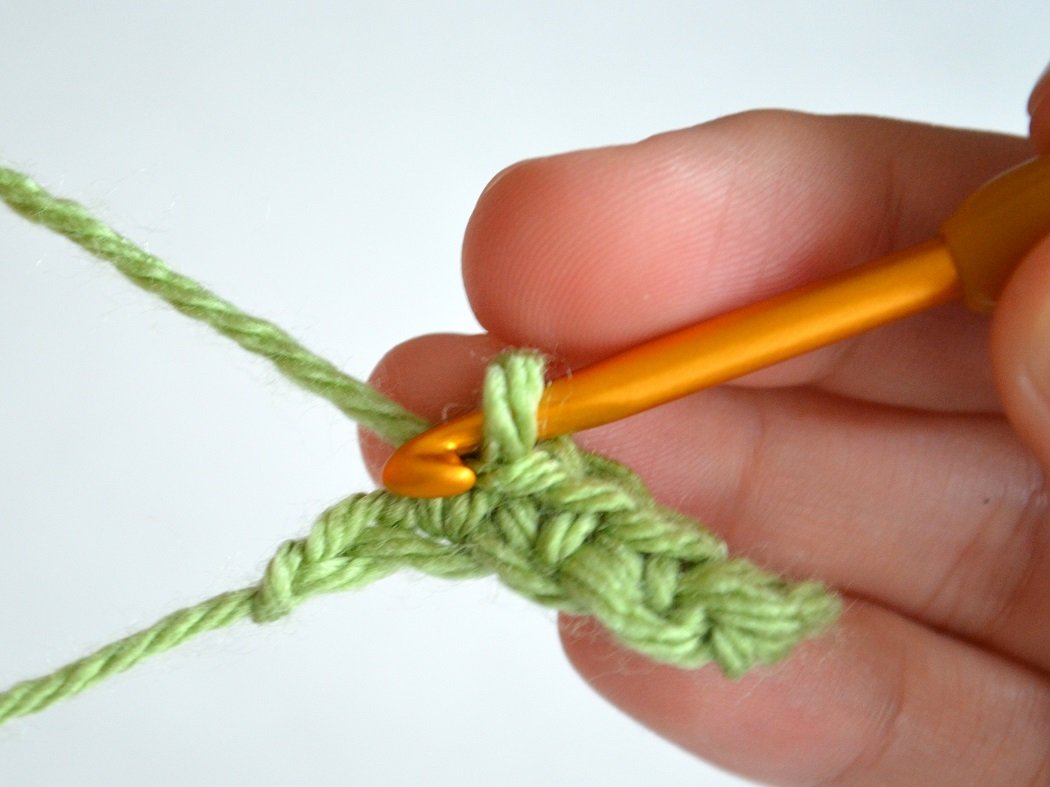
Yarn over the hook and insert it into the fourth chain from the hook. This skip creates the first "cloud" cluster. You are building the base of the puff by pulling up a loop of yarn.
Yarn over again and pull up another loop in the same stitch. Repeat this two more times until you have five loops on your hook. This accumulation of loops is what creates the bulk and softness of the cloud stitch.
Yarn over one final time and pull through all five loops on the hook. You now have one loop remaining. This secures the cluster. To finish the stitch, chain one to lock the puff in place and prevent it from unraveling.
Chain one to secure the cluster, then skip two chains and work the next cloud stitch into the following chain. Continue this pattern across the row: create a cluster, chain one, skip two, repeat. The chain-1 spaces between clusters allow the fabric to breathe and expand.
At the end of the row, you will have a final cluster. Chain three to act as the turning chain for the next row. This counts as your first half-double crochet or cluster base, depending on the specific pattern variation you are following. Turn your work and prepare for the next row.
Step 2: Work subsequent rows
For the second row, you will work into the chain-1 spaces created in the previous row. This offset placement ensures the clouds stack neatly rather than aligning directly on top of each other, which creates a more organic, wavy texture. Continue repeating the cluster pattern until your blanket reaches the desired length.
Step 3: Check your tension
Cloud stitch can tighten up if you pull too hard. Keep your tension loose and consistent. If the fabric starts to curl, check your stitch count. If it looks too loose, try a smaller hook. The goal is a drapey, soft fabric that feels like a fluffy cloud.
Build the blanket row by row
Now that you have your foundation chain, it is time to build the body of the cloud stitch blanket. This section focuses on stacking rows to create that signature fluffy, cloud-like texture. The secret to a professional-looking blanket is not speed, but consistency. If your tension stays steady and your stitches line up, the fabric will grow evenly without twisting or curling.
Work the first row
Start by working into the fourth chain from your hook. The cloud stitch is a cluster, which means you will work multiple partial stitches into the same space before pulling through all loops at once. This bunching of yarn is what creates the soft, puffy look.
Insert your hook into the chain, yarn over, and pull up a loop. Repeat this two more times in the same chain. You should now have four loops on your hook. Yarn over and pull through all four loops at once. You have completed one cloud stitch. Continue this pattern across the entire length of your foundation chain. At the end of the row, you will have a row of soft, bumpy clusters.
Turn and start the next row
Once you finish the first row, chain three. This is your turning chain, and it counts as the first double crochet of the new row. Turn your work so you are facing the opposite direction.
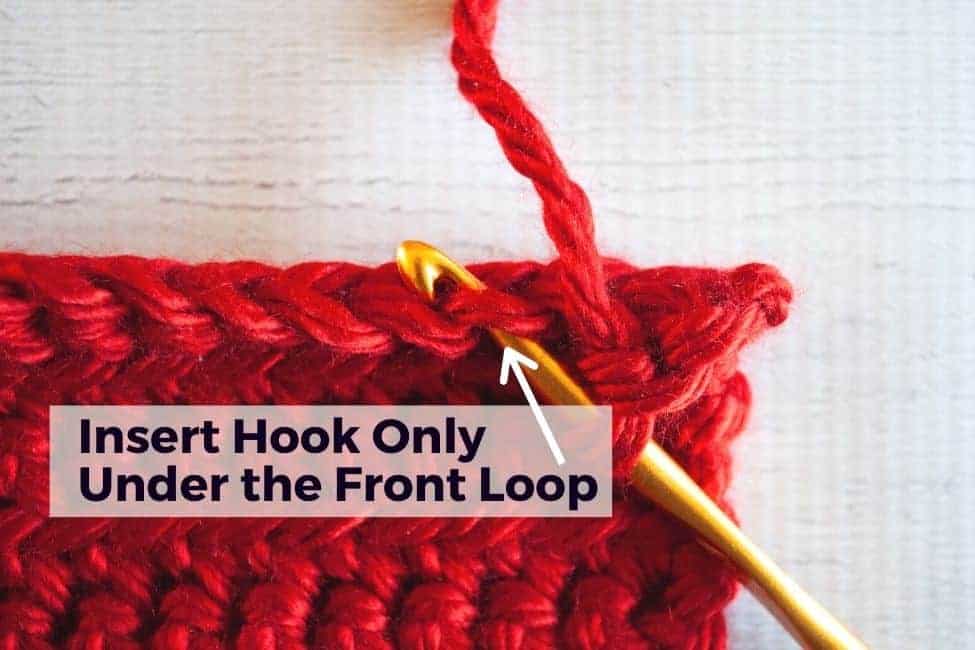
Look at the top of the cloud stitch cluster from the previous row. You will see a small "V" or space between the stitches. Insert your hook into this space. Yarn over and pull up a loop. Repeat this twice more in the same space to complete the next cluster. Yarn over and pull through all loops. This interlocking method keeps the blanket sturdy while maintaining its cloud-like softness.
Maintain consistent tension
As you continue row after row, pay close attention to how tightly you are pulling the yarn. If you pull too hard, the blanket will feel stiff and the stitches will look tight and cramped. If you are too loose, the fabric will sag and lose its shape. Aim for a relaxed but firm tension.
Keep your stitches aligned vertically. If you notice your edges are starting to curl or the rows are shifting sideways, check your turning chains. Make sure you are inserting your hook into the same spaces in each row. This rhythmic repetition is meditative and easy to master. Before you know it, your blanket will be growing into a thick, cozy layer perfect for snuggling.
Fix common cloud stitch mistakes
Even with the right yarn, tension control is the biggest hurdle for beginners. The cloud stitch relies on loose loops to create that signature fluffy texture. If your blanket feels stiff or flat, you are likely pulling too tight. Remember: Relax your grip. The cloud stitch needs loose tension to puff up correctly.
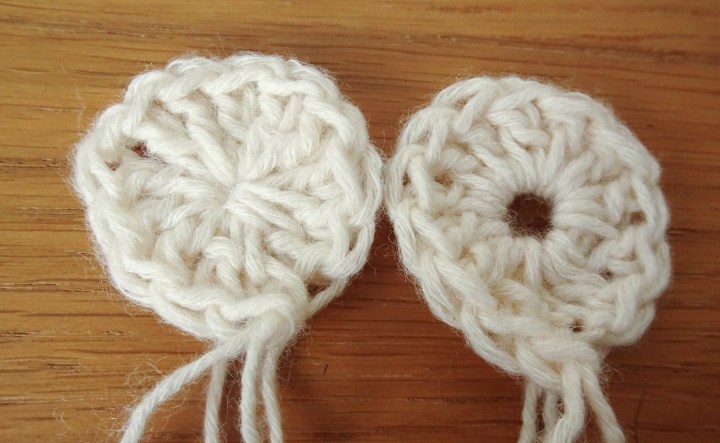
Uneven clusters
Clusters should look like little puffs of cotton candy. When they vary in size, the blanket loses its soft, cloud-like appearance. This usually happens when you don't wrap the yarn the same number of times for each cluster. Aim for consistency: three loops per cluster, every time.
If you notice a lumpier section, don't rip it out immediately. Gently tug the loose ends to redistribute the yarn. Most minor unevenness disappears once you wash and block the finished blanket.
Tight turning chains
Turning chains can accidentally tighten the edge of your row, creating a curved or wavy border. This is often because beginners pull the yarn too hard when making the initial chain stitches. To fix this, treat your turning chain as a placeholder for height, not a tight anchor point.
Keep your yarn tension even as you work up to the next row. If your edges start curling, check your stitch count. Sometimes adding one extra stitch at the start or end of a row can balance the tension and flatten the border.
Yarn selection issues
Using the wrong yarn weight can make the cloud stitch look dense or stringy. Stick to super bulky weight 5 yarn. This thickness provides enough volume to show off the stitch pattern without making the blanket too heavy or hard to manage. Thinner yarns will require many more stitches to achieve the same look, which can be frustrating for beginners.
Choose a light-colored yarn for your first attempt. Dark colors hide the texture of the clusters, making it harder to see if your stitches are even. A pale gray or soft white lets you clearly see every loop and puff as you work.
Finish and weave in ends
Your cloud stitch blanket is almost ready. The final steps are binding off and hiding your yarn tails. This part makes the blanket look neat and professional. It also keeps the stitches from coming undone.
Bind off
To bind off, crochet two stitches as usual. You now have two loops on your hook. Yarn over and pull through both loops. One loop remains on your hook. Repeat this process across the entire row. When you reach the last stitch, cut the yarn, leaving a 6-inch tail. Pull this tail through the last loop to secure it. Do not cut the tail yet.
Weave in ends
Thread your tail onto a yarn needle. Insert the needle under the bumps of the stitches on the back side of your work. Move the needle back and forth a few times to lock the tail in place. Trim any excess yarn close to the fabric. Repeat this for every loose tail. The result should be soft and fluffy with no visible knots.
Final checklist
-
Cut yarn leaving a 6-inch tail
-
Pull tail through last loop
-
Thread tail onto yarn needle
-
Weave tail under back stitches
-
Trim excess yarn
Common cloud stitch: what to check next
The cloud stitch is forgiving, but beginners often ask about yarn weight and hook size. Using a super bulky weight 5 yarn with a large hook (like 10mm or 12mm) creates that signature fluffy, soft drape. This combination lets the clusters form quickly without the fabric becoming stiff or heavy.
What is a "cluster" stitch?
A cluster is the heart of the cloud stitch. It groups several unfinished stitches together into one single stitch. Think of it like a puff of cotton candy. Instead of making one tall, thin post, you create a wide, textured bump that adds volume and warmth to your blanket.
Do I need to turn my work?
Yes. After completing each row of clusters, you must turn your work. This creates a woven, double-sided fabric. If you skip the turn, the stitches will lean in one direction, and the blanket will curl at the edges. A simple chain-1 at the start of each row acts as your turning chain.
Can I use cotton yarn?
You can, but it changes the result. Cotton is less airy than acrylic or wool blends, so the cloud stitch won't look as "cloudy." It will feel heavier and more structured. For that soft, huggable blanket feel, stick to synthetic blends or wool.
No comments yet. Be the first to share your thoughts!