
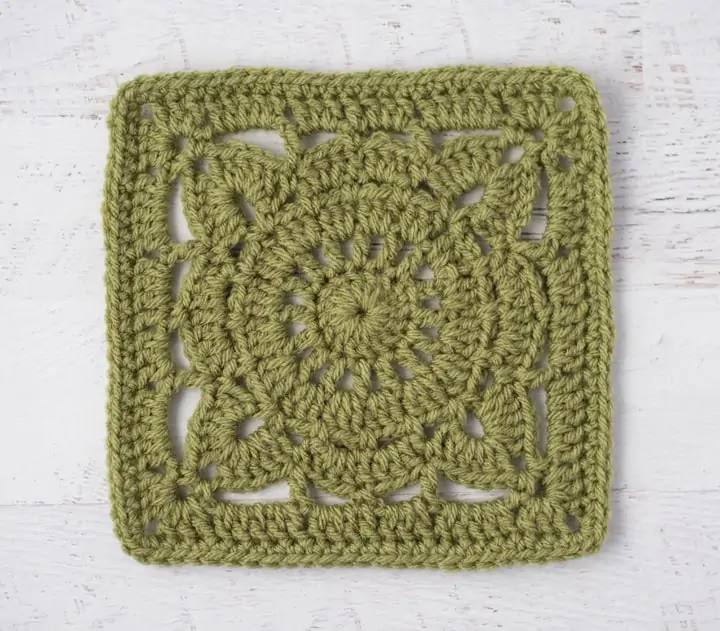
The return of the granny square
Crochet is experiencing a huge revival, and at the forefront of this trend are granny squares. What was once considered a vintage technique is now incredibly popular with a new generation of makers. This isn't just about aesthetics; it's about a growing desire for handmade items and a conscious effort to reduce waste in our consumption habits.
There’s a real appeal to creating something yourself, knowing where the materials came from, and having a unique piece that reflects your personal style. The beauty of crochet, particularly granny squares, is its adaptability. You can use up small amounts of yarn, making it a perfect project for scraps and leftovers. The history of the granny square goes back to the 19th century, but its current resurgence feels different, tied to a more mindful and sustainable approach to crafting.
If you need a refresher on the basics, B.Hooked Crochet has a straightforward tutorial on YouTube that covers the classic stitch. It has nearly a million views because the steps are easy to follow, making it a solid starting point for any scrap project.
Choosing your yarn
The most sustainable yarn is the stuff you already own. Before you head to the store, dig through your bins. Those half-used skeins and tangled leftovers are exactly what you need for a zero-waste project. Using up your 'stash' is the easiest way to keep your hobby from piling up in a landfill.
Different fiber types have different environmental footprints. Cotton is a natural fiber, but conventional cotton farming uses significant amounts of water and pesticides. Organic cotton is a better option, but it’s often more expensive. Wool is renewable and biodegradable, but sourcing can be a concern – look for ethically raised and locally sourced wool when possible. Acrylic is a synthetic fiber made from petroleum, so it’s the least sustainable option, but it's durable and affordable. Bamboo is often touted as eco-friendly, but the process of turning bamboo into yarn can be chemically intensive.
Recycled yarns are gaining popularity, made from repurposed materials like plastic bottles or textile waste. These are an excellent choice, but consider the quality and durability – some recycled yarns can be less consistent than others. Identifying yarn content is crucial. Check the yarn label for fiber composition; it’s usually listed as a percentage. Understanding the impact of each fiber will help you make informed choices and prioritize using what you already own. Don’t be afraid to mix fibers within a project – embracing the unexpected can lead to unique and beautiful results.
- Cotton is natural, but conventional farming uses a lot of water and pesticides.
- Wool is renewable and biodegradable, though it's best to look for local or ethical sources.
- Acrylic is a petroleum-based synthetic. It isn't the most eco-friendly, but it lasts a long time and is easy on the budget.
- Bamboo: Can be chemically processed, research the manufacturing.
- Recycled Yarns: Excellent choice, consider quality and durability.
Yarn Type Comparison for Sustainable Granny Squares (2026)
| Yarn Type | Sustainability | Cost | Durability | Washability | Granny Square Suitability |
|---|---|---|---|---|---|
| Cotton | High | Medium | Medium | High | Excellent |
| Wool | Medium to High (depending on sourcing) | High | High | Medium (often requires hand washing) | Excellent |
| Acrylic | Low | Low | Medium | High | Good |
| Bamboo | Medium to High (regenerative resource) | Medium to High | Medium | High | Good |
| Recycled Cotton | Very High | Medium to High | Medium to High | High | Excellent |
| Recycled Acrylic | Medium | Low to Medium | Medium | High | Good |
| Linen | High | High | High | Medium | Excellent |
Illustrative comparison based on the article research brief. Verify current pricing, limits, and product details in the official docs before relying on it.
Ways to use your scraps
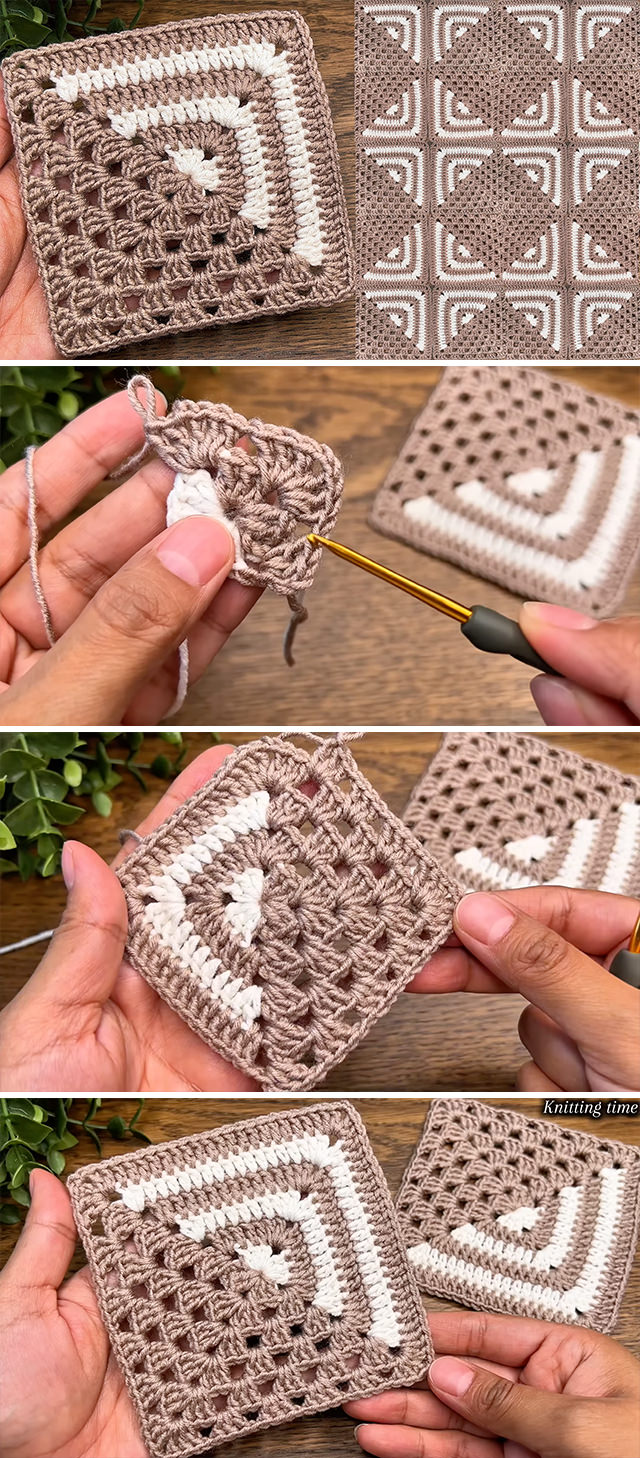
Once you’ve gathered your scraps, it’s time to get creative with how you use them. Planned color changes within a single granny square are a simple and effective way to use up small amounts of different shades. Instead of sticking to one color per round, introduce new colors every few stitches or rounds for a playful, patchwork effect.
When joining granny squares, use contrasting colors for the joining yarn to add visual interest and use up even more scraps. Consider creating "fragmented" squares – intentionally leaving small gaps or holes in the design, filled with different colored yarn fragments. This is a great way to use up the tiniest of pieces. Don't underestimate the power of embellishments; tiny scraps can be crocheted into flowers, leaves, or other decorative elements and stitched onto your squares.
Intentional project design is key. Before you start, sketch out your project and think about how you can accommodate varying scrap sizes. Don’t be afraid to embrace asymmetry or irregular shapes. The beauty of scrap-busting lies in the unexpected combinations and unique character of the finished piece. It’s about finding beauty in imperfection and celebrating the resourcefulness of using what you have.
Beyond the Square: Project Ideas
While blankets are the classic granny square project, the possibilities extend far beyond. Garments like vests, cardigans, and even dresses can be constructed from granny squares, offering a unique and textured look. Bags and totes are another excellent option, providing a sturdy and stylish way to carry your belongings. Think about cushion covers, wall hangings, or even small accessories like hats and scarves.
Skill level shouldn't limit your creativity. Beginners can start with simple blankets or cushion covers, using basic granny square patterns. More experienced crocheters can tackle more complex projects like fitted garments or intricate wall hangings. The B.Hooked Crochet video (youtube.com/watch?v=W-CqV9iJ14g) is a perfect starting point for mastering the fundamental granny square technique.
The versatility of the granny square is truly remarkable. You can vary the size, color, and texture of the squares to create a wide range of effects. Experiment with different joining methods to create seamless or more visible seams. Don't be afraid to combine granny squares with other crochet motifs or techniques to add even more personality to your projects. A solid granny square, like the one demonstrated by Adore Crea Crochet (youtube.com/watch?v=e3wU7J6r5oY), can provide a strong foundation for more complex designs.
Granny Square Layouts & Design
The layout of your granny squares can dramatically impact the overall look of your project. A simple grid layout is a classic choice, but don’t be afraid to experiment with more creative arrangements. Offsetting squares creates a dynamic and visually interesting pattern, while using different sized squares adds depth and texture.
Color theory plays a crucial role in creating a harmonious design. Consider using complementary colors (colors opposite each other on the color wheel) for a bold and vibrant look, or analogous colors (colors next to each other on the color wheel) for a more subtle and cohesive feel. Monochromatic color schemes, using different shades of a single color, can also be very effective.
Incorporating other crochet motifs, like flowers or geometric shapes, can break up the monotony of a repeating granny square pattern. Play with the direction of the squares – rotating some squares 90 degrees can create unexpected visual effects. Ultimately, the goal is to turn your scraps into something beautiful and intentional, reflecting your personal style and creativity.
Finishing Touches: Waste-Free Bind-Offs
Dealing with leftover yarn ends is a necessary evil in crochet, but there are ways to minimize waste. Weaving in ends securely is essential, but try to use as little yarn as possible. Instead of weaving ends back and forth multiple times, consider using a tapestry needle to carefully thread them through the stitches, creating a clean and secure finish.
You can also save the tiniest yarn clippings to use as stuffing for amigurumi or small ornaments. If you have enough short lengths, they work well for making tassels or adding fringe to the edges of a finished blanket.
Before discarding any yarn scraps, take a moment to consider if they could be repurposed. Even the tiniest pieces can be useful for adding texture or color to other projects. Thinking creatively about how to utilize every last bit of yarn is a key component of zero-waste crochet.
What's your biggest challenge when trying to crochet sustainably?
Sustainable crochet is all about making the most of every strand of yarn. Whether you are working on granny squares or other zero-waste projects, we want to know what hurdle you face most often. Vote below and share your experience with the You Get Hooked community!

No comments yet. Be the first to share your thoughts!