
Tunisian Beyond Basics
Tunisian crochet is enjoying a real moment right now, and it's extending far beyond the simple scarves and blankets many of us first learned to make. What was once considered a somewhat niche technique is now dominating feeds on Instagram, TikTok, and Pinterest. This isn't just a revival; it's a full-blown evolution, with crocheters pushing the boundaries of what’s possible with this unique style.
The appeal is easy to understand. Tunisian crochet offers a fabric with a distinctive texture, falling somewhere between knitting and traditional crochet. It's incredibly versatile, lending itself to everything from cozy home décor to intricate garments. But it's the recent innovations – the techniques that build on the foundation of traditional Tunisian – that are truly captivating the online crochet community.
This article explores ten advanced Tunisian crochet techniques gaining traction on social media, moving beyond basic stitches to methods for complex colorwork, dynamic textures, and modern designs.
Mosaic Magic: Colorwork Reimagined
Tunisian mosaic crochet is arguably the most popular of the emerging techniques. Unlike traditional colorwork like Fair Isle, which involves carrying multiple colors across the row, mosaic crochet works by alternating between two colors, creating the illusion of intricate patterns. Each row only uses one color, making it surprisingly manageable, even for beginners to colorwork.
The technique relies on staggered stitches, working into every other stitch on alternating rows. This offset creates the mosaic effect, where colors interlock to form geometric designs. It's a visually striking method offering creative freedom. YarnAndy’s tutorial from November 2024 is a helpful introduction.
While the concept is relatively simple, mastering mosaic crochet does require some patience. Managing your yarn to avoid floats, and accurately reading mosaic charts can be challenging at first. However, the results are well worth the effort. The technique is trending on platforms like Instagram and TikTok, with crocheters sharing their elaborate blanket designs, wall hangings, and even garments.
Tunisian mosaic is accessible; you don’t need a huge array of colors for beautiful designs. A simple palette of two or three contrasting colors can be effective, allowing experimentation without feeling overwhelmed. The finished fabric has a lovely drape, suitable for various projects.
Understanding the chart is key. These charts differ from traditional crochet charts, so learn how to read them to unlock new design possibilities. Crocheters create realistic images using this technique, from leaves and flowers to animals and landscapes.
Start small with a simple swatch or cushion cover to practice before tackling a larger project. Free patterns are available online to suit your skill level and aesthetic.
Textured Tunisian: Puff, Pop, and Beyond
Adding texture elevates Tunisian crochet projects. While the standard Tunisian simple stitch is beautiful, incorporating puff, popcorn, and bobble stitches adapted for Tunisian crochet creates a 3D effect, adding depth and dimension to the fabric.
The basic principle is similar to adding these stitches in regular crochet, but the execution is slightly different to accommodate the Tunisian structure. For example, Tunisian puff stitches involve working multiple yarn overs into a single stitch, then pulling through to create a raised, puffy effect. Popcorn stitches are created by working a series of stitches into the same stitch, then closing them together.
These textured stitches suit blankets, scarves, and cushions, adding a cozy, tactile quality for home décor. Pinterest aesthetics favor texture, so incorporating these stitches keeps projects on-trend. Consider chunky, tactile blankets and cushions for a cozy feel.
Experimenting with different combinations of textured stitches can create even more interesting effects. Try alternating rows of puff stitches with rows of simple stitch, or incorporating popcorn stitches into a mosaic pattern. The possibilities are endless.
Interlocking Tunisian: A New Dimension
Interlocking Tunisian crochet creates a woven-like fabric with a unique drape. It differs from standard Tunisian crochet as stitches interlock with the previous row, forming a solid, textured fabric. It's a slower process, but the result is beautiful.
The stitch construction is key. You essentially work a forward pass and a return pass, but instead of working into the stitches of the previous row, you work under the vertical bars created on the return pass. This interlocking creates the woven effect. Consistent tension is crucial for achieving a neat, even fabric.
Interlocking Tunisian crochet suits shawls, garments, and accessories. The fabric has a lovely drape and substantial weight, ideal for pieces needing to hold their shape. It also creates a durable fabric.
Interlocking Tunisian crochet is more complex and time-consuming than standard Tunisian crochet. However, the unique texture and drape make it worth the effort. It's a good technique to add if you seek something different.
Tunisian Cables: Classic Style, Modern Twist
Cables are a classic crochet element that translate well into Tunisian crochet, adding sophistication and texture. However, cabling in Tunisian crochet presents unique challenges due to longer row length and different stitch structure.
The main challenge is managing the stitches while creating the cable. You’ll typically use a cable needle or stitch markers to hold the stitches in place while you work the cable twist. The process involves slipping stitches from one needle to another, then working them in a different order to create the cable effect.
Simple cable patterns, like a single cable down the center, are relatively easy. More complex designs with multiple cables and intricate twists require more patience and skill. Many free patterns are available online, from beginner to advanced.
This technique creates modern, sophisticated designs. Combining the Tunisian stitch with a classic cable pattern results in a unique, eye-catching look. It adds elegance to projects.
The Delightful Tunisian: Stitch Combinations
Combining different stitches within a single project is an exciting aspect of advanced Tunisian crochet. This allows for visually interesting textures and unique patterns. Experiment!
Rohn Strong’s "Tunisian Delight" Afghan tutorial from May 2020 inspires stitch combinations. The afghan showcases various Tunisian stitches arranged harmoniously, demonstrating how varying stitch textures create depth and dimension.
For example, you could combine Tunisian knit stitch with Tunisian purl stitch to create a rib-like effect. Or you could alternate rows of Tunisian simple stitch with rows of Tunisian puff stitch to add texture. The possibilities are endless.
Consider the visual weight of each stitch. Some stitches are more prominent, so balance them carefully for a cohesive design. Experiment with combinations until you find what you like. Mistakes are how you learn.
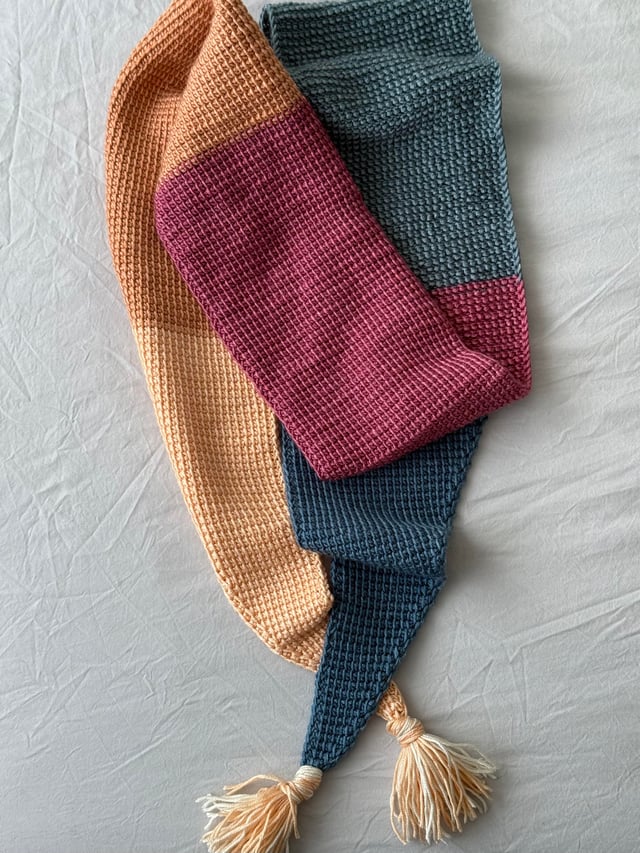
Tunisian Color Blocking: Bold Statements
Color blocking translates well into Tunisian crochet. Using large blocks of contrasting colors creates bold, graphic designs that turn heads. It's a simple technique with a big impact.
When choosing colors for color blocking, consider color theory. Complementary colors (opposite on the color wheel) create high contrast. Analogous colors (next to each other) create a harmonious look.
Color-blocked Tunisian projects suit blankets, pillows, and wall hangings. The bold designs add a modern, geometric touch to any space. It adds a pop of color to home décor.
What is your biggest challenge when working with Tunisian crochet?
Tunisian crochet is gaining serious traction on social media, but it comes with its own unique learning curve. Whether you are just picking up your first Tunisian crochet hook or you have been experimenting with advanced techniques, we want to hear from you. Vote below and let our community know where you find yourself struggling the most so we can create more targeted tutorials and guides to help you level up your skills.
Rounded Rows & Shapes
Creating rounded shapes in Tunisian crochet opens new project possibilities. Whether making amigurumi, hats, or bags, working in the round is essential, requiring adjusted stitch counts and strategic increases or decreases.
The technique
YarnAndy’s tutorial on rounded rows and shapes is a valuable resource for learning this technique. It provides clear instructions and helpful tips for achieving a smooth, even curve. Mastering this skill allows you to create a wide variety of three-dimensional projects.
Remember to pay close attention to your stitch count and tension. Maintaining consistent tension is crucial for creating a smooth, even curve. Don’t be afraid to experiment with different stitch combinations and shaping techniques to achieve the desired effect.
No comments yet. Be the first to share your thoughts!